How to Build Model Ships – Part One | ModelSpace
There’s a lot to love about a well-crafted, well finished model ship. The art, the history, the craft – all of these elements, when done right, combine to give you a statement piece that will look incredible no matter where you display it. But what ship should you build? And where do you begin? Read on for part one of our beginner tips on how to build model ships!
Choosing your model ship
Before you set sail on your ship building journey, there are a few factors to consider when choosing your vessel:
- Difficulty level – Truth be told, model ships are on the harder end of the scale model difficulty scale. Take into account your own experience, and review the ship you’re looking to build. If you are willing to learn, starting with a smaller, less detailed ship can be a great way to hone your craft before building something trickier.
- Scale and size – Larger ships often have more detail, and give you a more accurate representation of the real ship, whereas smaller scales can generally be built more easily and displayed in more places. Before you build, you will also need to ensure you have the bench space for your finished model.
- Instructions – While scratch building a model ship is achievable and commendable, if you’re new to this type of model you’ll need a detailed set of instructions for each stage of the process. Check these before you start, and get a feel for the project as a whole.
Tools for model ship building
Every great ship builder uses a variety of tools for their craft, and model ship building is no different. Here are some of the most common tools you’ll need for your ship building project:
- Hobby knife with spare blades
- Pliers
- Needle files
- Ruler
- Measuring tape
- Sandpaper and/or sanding blocks
- Hammer
- Mitre box
- Pin vice
- Plane
- Plank bender
- Planking screws
Now that you’ve chosen your scale model ship, it’s time for the fun to begin. Below are a few of the key steps needed to build model ships.
Reviewing your model pieces
This should go without saying, but it’s important when starting any model building project to check that you have everything you should have. Lay out the pieces, and check they match what is listed in your build instructions. Now’s a great time to also confirm the tools you are going to need moving forward.
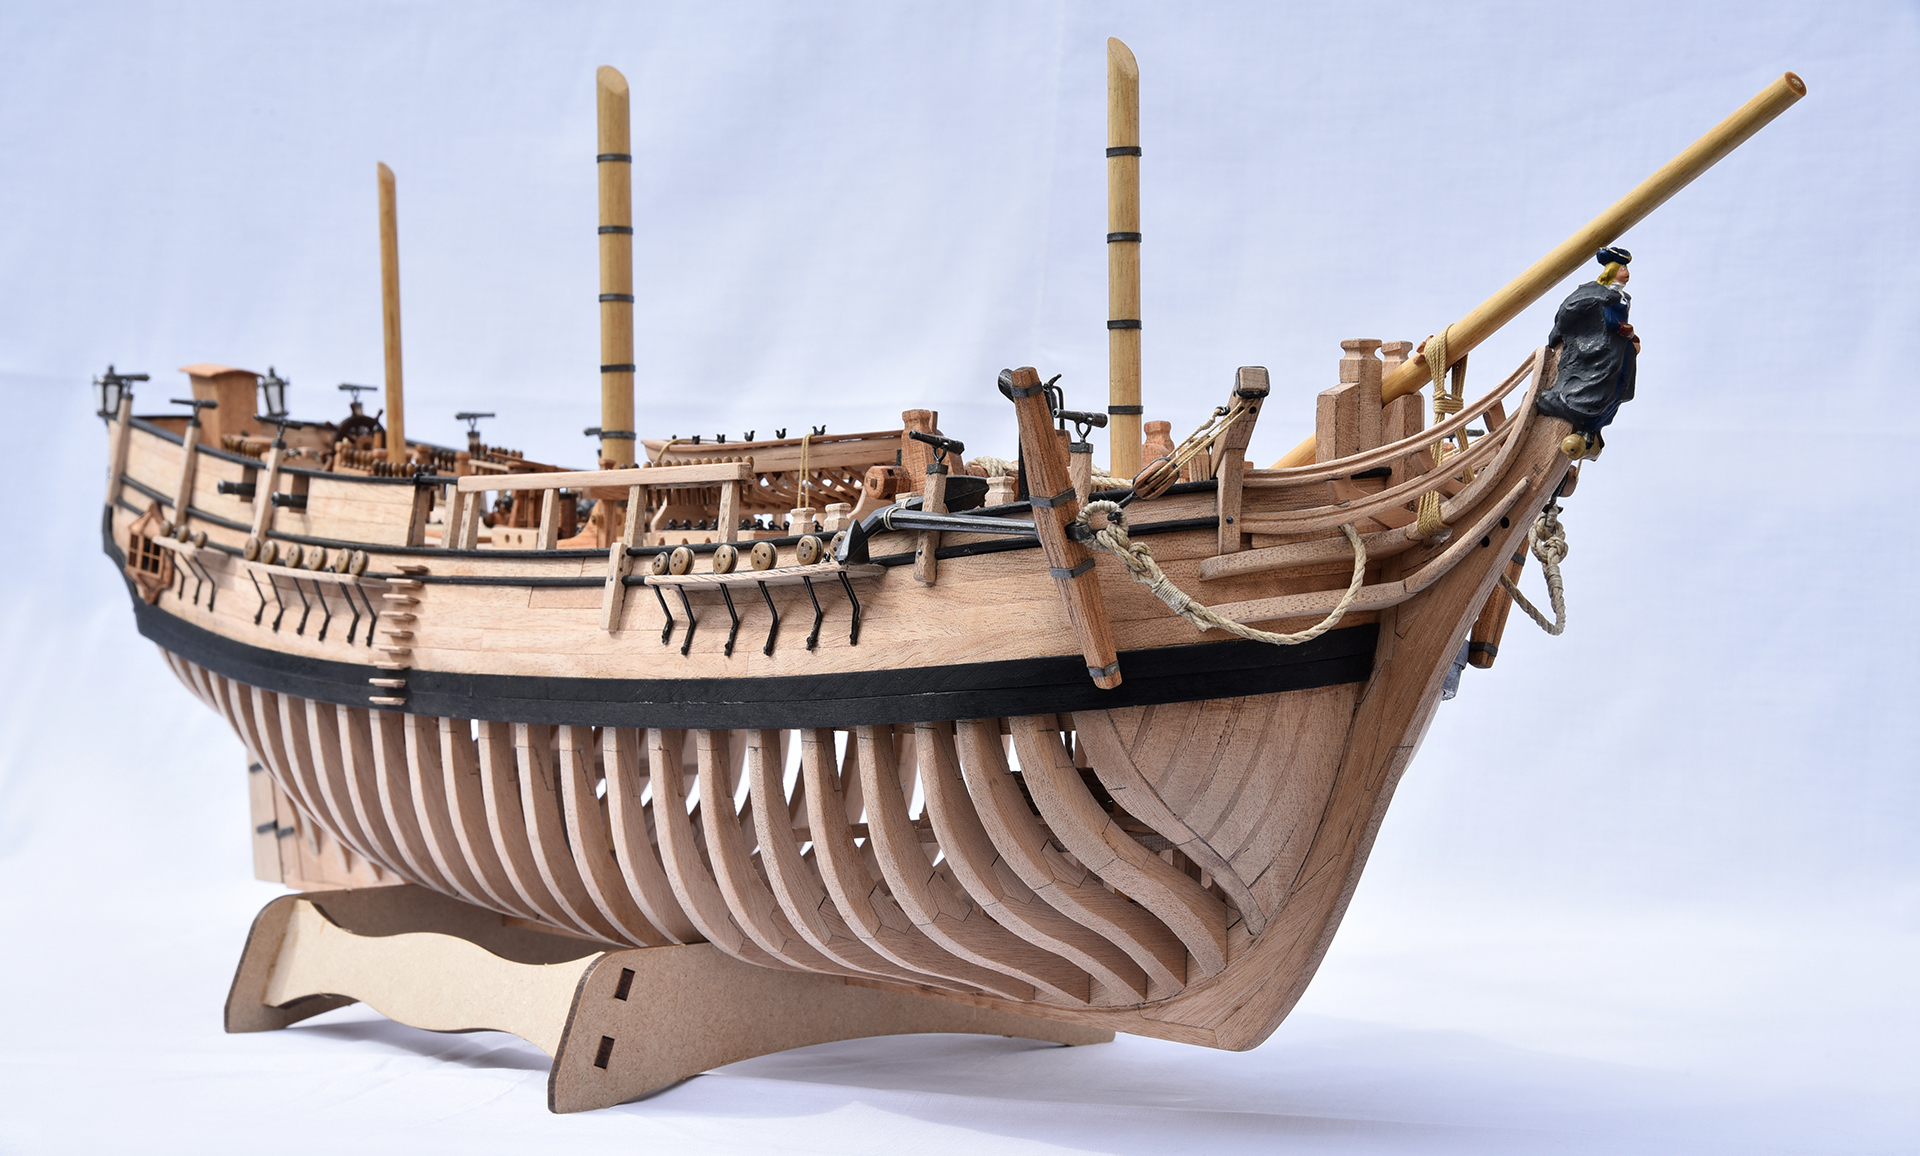
Building your model ship frame
Start by building the ship’s frame, as this will give you the body of your model. From this body, you can add all the other major components to bring your model ship to life. Here are some quick tips for building a scale model ship frame:
- Insert your bulkhead frames into your keel – the long piece which runs the length of your model ship. The keel will have slots where you can insert the bulkheads.
- Check that everything is firmly in place before applying glue.
- Use sandpaper or sanding blocks to level off any parts that are out of alignment with the other pieces.
Levelling your model ship’s bulkheads
Before laying down any planks, you need to ensure that they will lay straight and even across each of the bulkheads. Here are a few key steps to check that your model ship bulkheads are level:
- Lay your first plank across the bulkheads to check the bevel.
- Take note of any spaces between the plank and bulkheads.
- File or sand down any problem bulkheads so that the first plank lays flat and even across all of them. You want them to have full, thick contact, not just a thin edge.
- Check each side of your bulkheads.
- If you file or sand down any bulkhead too far, you can add thin wood pieces to remedy this later.
- Recheck before proceeding – this is one of the most important steps in building a satisfactory scale model ship.
Adding your model ship’s first planks
Now that your bulkheads are aligned and you have checked that the planks will lay flat, you can start adding them to the frame. By the end of this step you will have the hull, and a better feel for how your model ship will look. Here are some tips for laying model ship planks correctly:
- Following the provided instructions, take extra time placing and affixing your first plank. This will help you determine the placement of each plank that follows.
- Place your planks in pairs, as this will help keep them level and aligned evenly.
- For additional flexibility, you can soak your planks in water before placement.
- Remember that your planks will run the full length of the model ship, fore to aft.
Thus concludes part one of our guide for how to build model ships. By now you should have gotten a good feel for the build, the pieces, the overall instructions, and a first glimpse at how it will all come together. If you’re ready to keep building, check out part two now!


